Getting Started with SFTPPlus on Linux
Download and installation steps
Open your terminal and change the directory to where you downloaded the SFTPPlus package.
Using the self-extractable package
If using the .sh SFTPPlus package, just launch it as root os using sudo. Optionally, provide the install directory as a parameter.
$ ls
sftpplus-lnx-x64-trial.sh
$ sudo sh ./sftpplus-lnx-x64-trial.sh /opt/sftpplus
Using the gzipped TAR package
If using the .tar.gz file, first unpack it in your desired installation path.
$ ls
sftpplus-lnx-x64-trial.tar.gz
$ tar xfz sftpplus-lnx-x64-trial.tar.gz
$ sudo mv sftpplus-lnx-x64-trial /opt/sftpplus
All steps beyond unpacking the archive can be handled by the shell script found at bin/install.sh in the hierarchy of SFTPPlus files.
$ sudo /opt/sftpplus/bin/install.sh
Adjust the default configuration file and start the service
In order to explore the SFTPPlus features, we will use the default
configuration file in which we enable a test account named
test_user with the password test_password.
The files for this account are stored in /tmp/test_user-files.
SFTPPlus comes with extensive documentation for all of the sections:
You can fully configure the SFTPPlus server using the configuration file
available at configuration/server.ini.
You also have the option of configuring SFTPPlus from a web based management
console.
The web console is available by default on https://127.0.0.1:10020.
To help with testing and quick troubleshooting we will start the service in debugging mode. On start SFTPPlus will provide detailed information about the services, connections and errors if there will be any.
$ ./bin/admin-commands.sh debug
Changing the admin credentials of the default administrator
To change the default admin credentials, go to the Administrators section.
Select the account, then edit both username and password. Make sure to apply all changes.
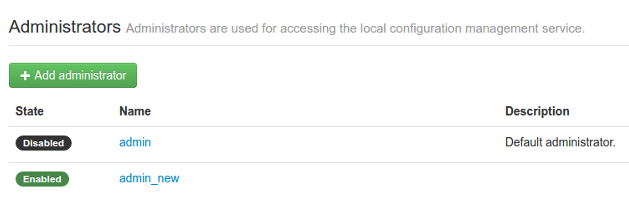
To create a new administrator account, select Add administrator, then configure its username and password. Ensure that this account is enabled and that the default admin account is disabled as shown in the screenshot below:
For security purposes, the default configuration has no accounts enabled for file transfer services. You can enable the sample accounts or create your own accounts.
Enable the test account
The SFTPPlus Web Manager is the web console available over HTTPS on
port 10020.
It comes with a default administration account. The username is admin and
the password is the one chosen for «ADMIN_PASSWORD» during initialization.
Use the credentials to log in before proceeding with the next step.
If you get the This site is not secure message, click on the Details and then Go on to the webpage. This message is due to your self-signed SSL certificate, which SFTPPlus generates as part of the installation process.
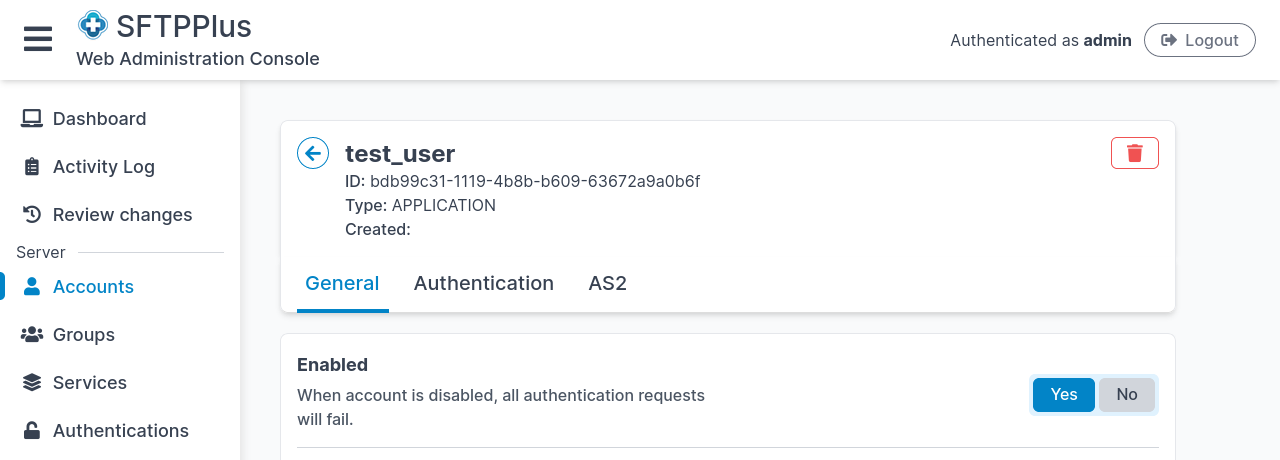
The default configuration also provides a test account test_user with the password test_password. For security reasons, this account is disabled by default. To enable this account, find the Accounts section and click on the test_user.
Next we will enable the account. Change the home folder. And finally enable SFTPPlus to create the missing new home folder. You can find all the options we need to change below:
Enabled: Yes
File access -> Path:
/tmp/test_user-files/Advanced account configurations -> Create missing home folder: Yes


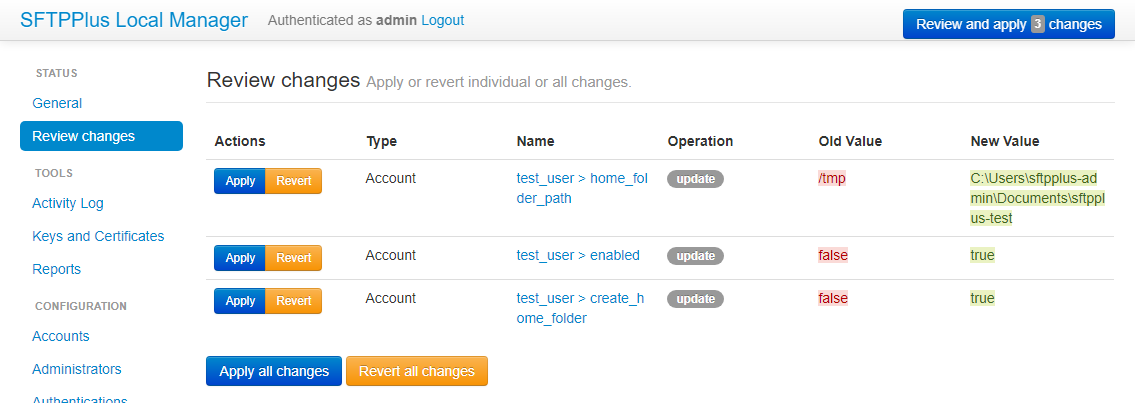
In order to apply the changes, scroll down to the bottom of the page and click Review and apply. SFTPPlus will show all the changed configurations to be applied and show which components require a restart. To proceed, click Apply all changes.
Connect to the server and upload a file
You can use any SFTP client to connect and upload or download the files from the SFTPPlus server. We will be using FileZilla to upload a test file. Open FileZilla and fill in the following values:
Host:
sftp://127.0.0.1Username:
test_userPassword:
test_passwordPort:
10022
Next click Quickconnect. Please accept the SSH key fingerprint warning that FileZilla will show. The SSH fingerprint is derived from the SSH keys generated as part of the SFTPPlus installation. Use the Local site panel in FileZilla to point to a location with a file for upload. In the screenshot, we created and uploaded an empty text file from the Desktop folder.
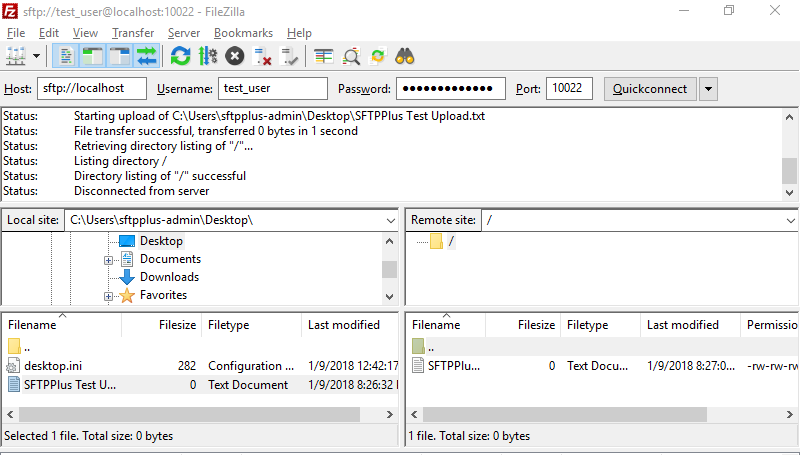
Upon completion, this file should be available in the earlier defined home folder location.
You can use a graphical SFTP client or the command line sftp(1) remote file
copy program provided by most of the modern Linux distributions to upload and
download the files. In the example below, the transferred file will be stored at
/tmp/test_user-files/README-sftp-test, to run it,
open a new console window:
$ sftp -P 10022 test_user@127.0.0.1
test_user@127.0.0.1's password:
Connected to 127.0.0.1.
sftp> put doc/README README-sftp-test
sftp> quit
$ ls -l /tmp/test_user-files/
Configuration items
Three different types of accounts are available in SFTPPlus:
Manager accounts - only for management operations
OS accounts - only for file transfer operations
Application accounts - only for file transfer operations
Accounts dedicated to file transfer operations have multiple Authentication Methods by which remote file transfer clients can be verified and given permission to perform file transfer operations.
Note that, by default, SFTPPlus only allows operating system accounts
from the example-group1 and example-group2 OS groups.
You need to update the configuration to match your target group or
groups.
Changing the default log file configuration
To prevent creating huge log files, the default configuration creates a log file which is automatically rotated at the end of the day.
To prevent data loss, the default configuration doesn't delete any rotated files. If no action is taken on installations experiencing high transfer volumes, this can lead to log files filling up available disk space.
For further details on changing the log configuration, please go to the Event Handlers section.
Please take the time to alter the log file configuration option to suit your needs.