
Client Documentation
2.2. Windows Installation
SFTPPlus Client is distributed as a self contained archive and has no external dependencies.
To install the SFTPPlus Client, extract the SFTPPlus Client distributable archive and place the extracted files into:
c:\SFTPPlus
Before continuing check that the user under which SFTPPlus Client will be running is the owner and has read and write permissions for the installation folder. It should also have the same permissions for all the files and folders it will transfer. To ensure the SFTPPlus Client service will be able to start once installed, one should verify that the service account has “Log on as a service” right on the computer. To check this, open Local Security Settings (Secpol.msc), browse to Local Policies, User Rights and verify “Log on as a service” policy properties. The service account should be listed, otherwise add it before proceeding with the installation.
Note
If the User Account Control is enabled on your computer use “Run as Administrator” when opening the command prompt. User Account Control is enabled by default on Windows Vista, Windows 7, 2008 Server and recent versions of Windows. For more information about User Account Control on Windows Vista visit Microsoft Library.
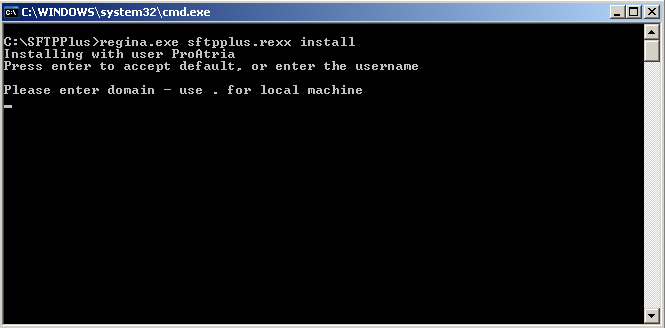
To install SFTPPlus Client as a service run InstallSFTPPlus.bat from the install folder. Installing as a service will run it at startup under a user specified during the installation process. This can be used to create a secured environment for the SFTPPlus Client.
The default username is the one you are logged in with. To accept the default just press Enter.
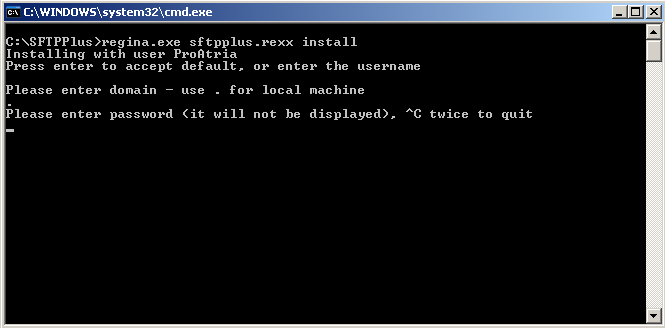
Enter domain or use . for the local machine.
Enter the password for the username and press Enter. The password will not be displayed as you type.
Retype the password for confirmation and press Enter.
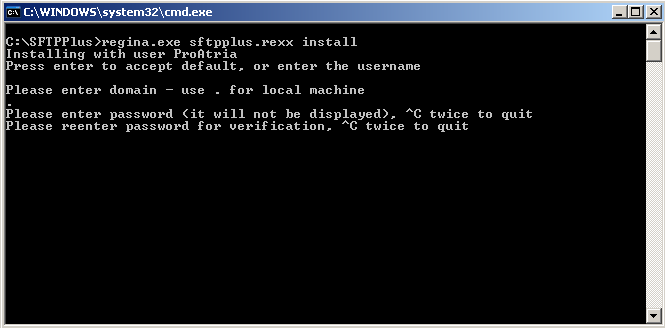
If you want to quit the install process at any time press CTRL + C twice.
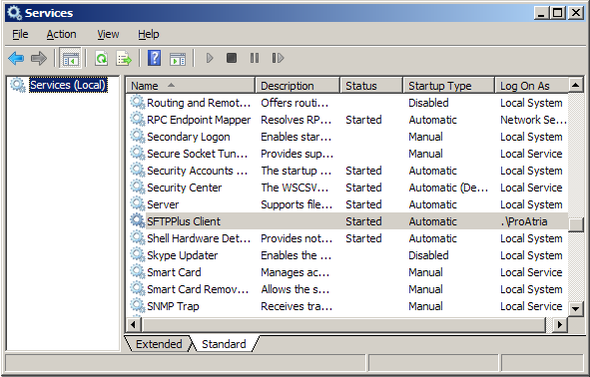
The SFTPPlus Client will be available as a Windows service named “SFTPPlus Client” and it can be managed using the standard Windows services tools.
To start or stop the SFTPPlus Client service you can also use the StartSFTPPlus.bat and StopSFTPPlus.bat scripts from the installation folder.
2.2.1. Client folder structure
- .\ contains client operational commands and global configurations
- .archive folder where successfully transferred files and logs are moved
- .conf stores transfer definitions files
- .failed stores failed transfers
- .inbox default folder used by SFTPPlus Client to get or put files
- .outbox temporary folder from where files are sent
- .retry folder where failed transfer should be moved to retry the transfer
2.2.2. Uninstall SFTPPlus Client
To uninstall, first remove the SFTPPlus Client service by running RemoveSFTPPlus.bat and then delete the installation folder.